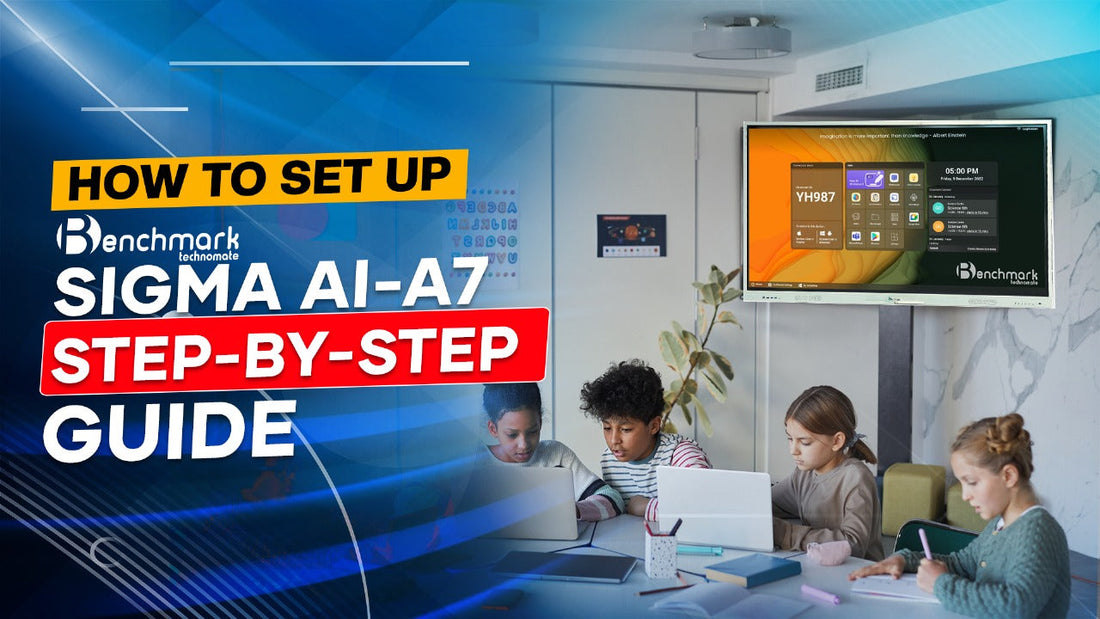
How to Set Up Benchmark Sigma AI-A7: Step-by-Step Guide
Setting up your Benchmark Sigma AI-A7 can seem daunting at first, but with the right instructions, you’ll be up and running in no time. Whether you’re preparing a smart classroom, corporate meeting room, or creative studio, the Benchmark Sigma AI-A7 offers powerful features that transform digital collaboration and learning experiences.
This step-by-step guide will walk you through the entire setup process, ensuring your Benchmark Sigma AI-A7 operates at its full potential. Let’s get started!
Why Setting Up the Benchmark Sigma AI-A7 Properly Matters
Proper setup of the Benchmark Sigma AI-A7 ensures optimal performance, high-quality visuals, and smooth touch functionality. From schools to corporate offices, having the display configured correctly enhances usability, durability, and productivity.
What You Need for Benchmark Sigma AI-A7 Setup
Before diving into the setup process, gather the necessary tools and components:
-
Benchmark Sigma AI-A7 Display
-
Power Cable & Adapters (included)
-
Remote Control (included)
-
Wall Mount or Stand (as per your requirement)
-
HDMI Cable, Type-C Cable, USB 3.0 Cable (if connecting external devices)
-
Wi-Fi & Bluetooth Network Details (for connectivity)
-
Mounting Tools (if applicable)
Also Read: Best Mic for YouTube with Noise Cancellation: Top Picks for Clear Audio

Step 1: Unboxing the Benchmark Sigma AI-A7
-
Carefully unbox the Benchmark Sigma AI-A7 and all included accessories.
-
Inspect all components for any physical damage.
-
Ensure that you have received all necessary cables, remote control, and mounting hardware.
Step 2: Positioning & Mounting the Display
Depending on your intended use, you can choose to wall-mount the Benchmark Sigma AI-A7 or place it on a stand.
-
Wall-Mounting
-
Attach the mounting brackets to the back of the display.
-
Secure the brackets to the wall using appropriate anchors and screws.
-
Hang the Benchmark Sigma AI-A7 on the wall mount and double-check stability.
-
-
Stand Mounting
-
Attach the display to a compatible stand using the provided screws.
-
Ensure the stand is placed on a stable, flat surface.
-
Also Read: Teachers Ke Liye Best PTZ Camera: Online Teaching Ka Perfect Tool

Step 3: Connecting Power & Cables
-
Plug the Benchmark Sigma AI-A7 into a power outlet using the supplied cable.
-
Connect your external devices such as laptops, desktops, or cameras via:
-
HDMI Ports (x3)
-
USB 3.0 Ports
-
Type-C Port
-
VGA Port (if required)
-
-
Turn on the display using the power button or the remote control.
Step 4: Setting Up Network Connectivity
The Benchmark Sigma AI-A7 supports both Wi-Fi and Bluetooth 5.0 for seamless connectivity.
-
Wi-Fi Setup:
-
Go to the Settings Menu.
-
Select Network & Internet.
-
Choose Wi-Fi and select your network.
-
Enter the password and connect.
-
-
Bluetooth Setup:
-
Navigate to the Bluetooth Settings.
-
Turn on Bluetooth and pair with your desired device (speakers, keyboards, etc.).
-
Step 5: Configuring the Operating System
The Benchmark Sigma AI-A7 runs on Android 13 with Dual OS Compatibility (Windows + Android).
-
Initial Setup:
-
Follow the on-screen instructions to set up your preferred language, time zone, and date.
-
Install essential apps from the Google Play Store if needed.
-
-
Switching Operating Systems (if applicable):
-
Select the OS mode you wish to use from the main menu.
-
Windows mode is compatible if connected via HDMI or Type-C from a compatible device.
-
Also Read: Benchmark Sigma AI A7 Interactive Flat Panel: Transforming Learning and Collaboration
Step 6: Calibrating Touch Screen & Display Settings
The Benchmark Sigma AI-A7 offers 40 touch points with Zero Bonding Optical Touch Technology.
-
Touch Calibration:
-
Navigate to Settings > Display > Touch Calibration.
-
Follow the prompts to adjust touch sensitivity and accuracy.
-
-
Display Settings:
-
Adjust Brightness, Contrast, Resolution (4K UHD - 3840x2160) for optimal visuals.
-
Enable Eye Protection Mode if needed for prolonged usage.
-
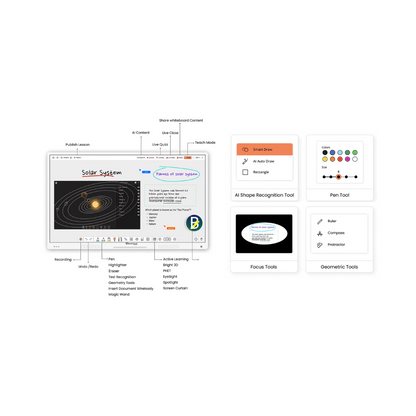
Step 7: Installing Additional Software & Apps
Maximize the performance of the Benchmark Sigma AI-A7 by installing essential applications.
-
Educational Apps for teaching and annotation.
-
Collaboration Tools like Zoom, Google Meet, or Microsoft Teams.
-
Screen Casting Apps for wireless device connections (up to 9 devices).
Step 8: Testing & Troubleshooting
-
Perform a test run by connecting devices and using the touchscreen.
-
Ensure all ports and inputs are functioning correctly.
-
Test audio by playing media using the 20W + 20W Built-in Speakers.
-
If issues arise, consult the user manual or reach out to Benchmark Technomate Support.
Step 9: Maintaining Your Benchmark Sigma AI-A7
To keep your Benchmark Sigma AI-A7 in top condition:
-
Clean the screen with a microfiber cloth.
-
Avoid harsh chemicals that may damage the 9H tempered glass.
-
Check software updates regularly for optimal performance.
Benefits of Setting Up Benchmark Sigma AI-A7 Correctly
Proper setup of the Benchmark Sigma AI-A7 ensures:
-
Seamless connectivity and user experience.
-
Improved productivity for both educational and corporate use.
-
Crystal-clear visuals with 4K UHD resolution.
-
Maximum utilization of the 40-point touch technology.
Conclusion
Setting up the Benchmark Sigma AI-A7 is straightforward when you follow these steps. Whether you're using it for smart classrooms, corporate boardrooms, or content creation, this display offers an exceptional experience with its high-quality visuals and responsive touch technology.
Looking to make the most out of your Benchmark Sigma AI-A7? Explore more guides and tips to unlock its full potential!
FAQs
How do I connect my laptop to the Benchmark Sigma AI-A7?
You can connect via HDMI, USB Type-C, or wireless casting using compatible apps.
Can I use Benchmark Sigma AI-A7 with Windows and Android?
Yes, it supports Dual OS Compatibility for seamless integration.
What should I do if the touchscreen isn’t responding properly?
Recalibrate the touch settings through Settings > Display > Touch Calibration.
How do I clean the Benchmark Sigma AI-A7?
Use a microfiber cloth and avoid harsh chemicals to prevent screen damage.
Where can I get support for Benchmark Sigma AI-A7 issues?
Visit the Benchmark Technomate support center or refer to the user manual.
Prev post

How to Connect Devices to Benchmark Sigma AI-A7: HDMI, USB, Wireless Options
Updated on 15 April 2025
Next post

Best Interactive Display for Hybrid Learning: Benchmark Sigma AI-A7 Review
Updated on 11 April 2025


